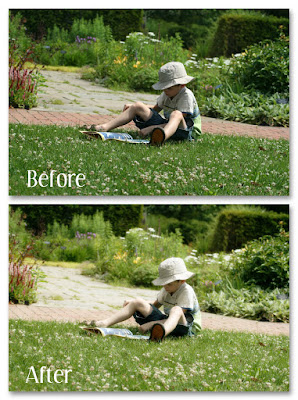
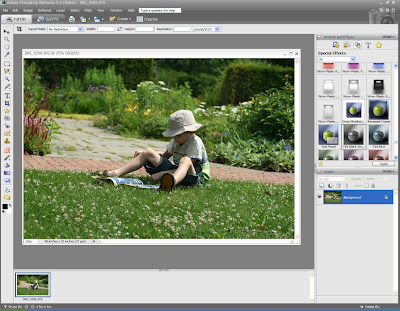
Step 1: Open your photo in Adobe Photoshop Elements.
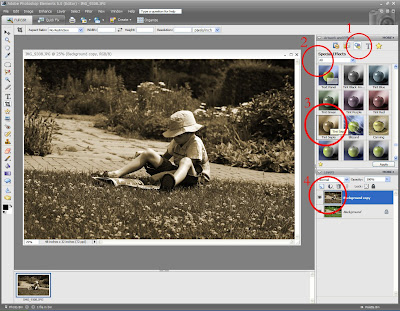
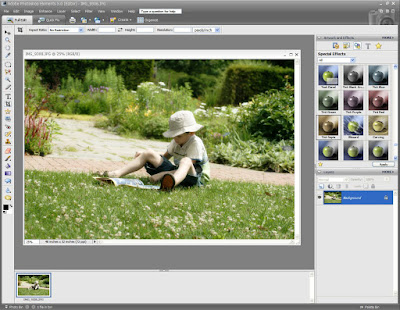
Step 2: At the top right side under "Artworks and Effects", click on "Apply Special Effects, Filters, and Layer Styles" labeled number 1. Select "All" labeled number 2 on screen shot. Scroll way down until you get to "Tint Sepia" (labeled 3). Double click on that. Once you do that you will see that it creates another layer in the layers palette on bottom right. Leave that layer highlighted blue ... labeled 4.
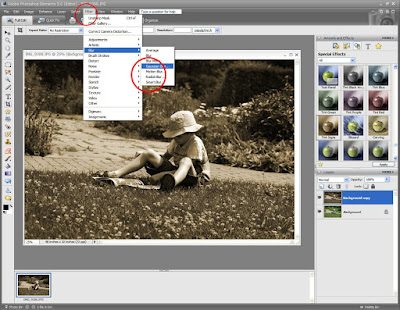
Step 3: At the top bar, go to Filter>Blur>Gaussian Blur.
Step 4: Once the box pops up go all the way to 20 (you can experiment with lower numbers if you want to - if your final product is coming out too blurry). Your image will look super blurry, don't worry about that, we will fix it in next step. Click "Ok."
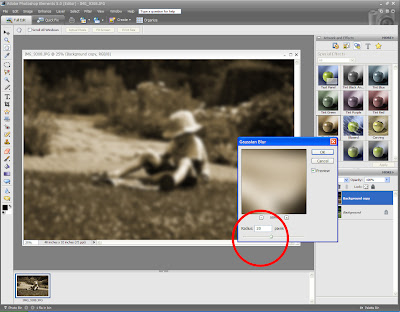
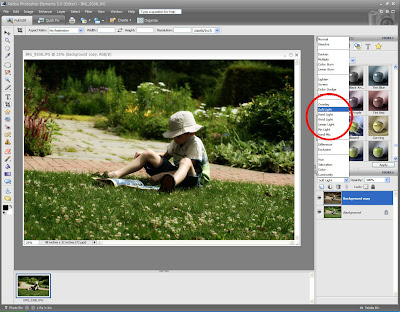
Step 5: You are still working with that super blurry image. Right above the 2 layers of the photos on the layers palette (on the bottom right side) click on the arrow that says "Normal." Go all the way up until you go to "Soft Light."
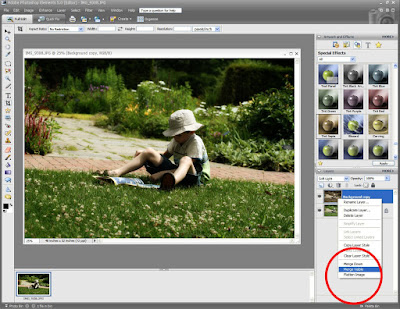
Step 6: RIGHT-click on the top "brown" image in the layers palette and and go down to "Merge Visible."
Step 7: Now your layer is flattened and you will probably need to adjust the brightness. Go the top bar, Enhance>Adjust Lighting>Levels.
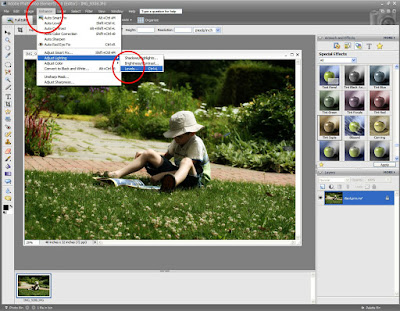
Step 8: A box will pop out. Move both arrows to the left and adjust as desired for your photos. You might want to play around with this box to get that right amount of brightness. You might want do the most adjusting on the middle arrow and just a bit on the right arrow. Click "OK"
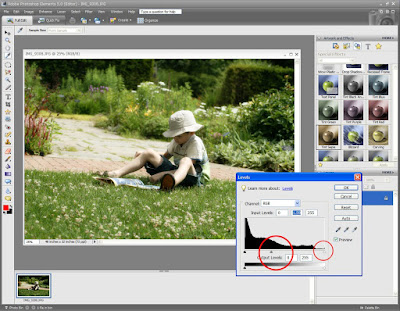
Step 9: A VERY important step. Save your photo under a different name and you are done!


thanks for sharing! I've followed these steps a couple of times now, and still end up with a mess, and no clue what I've done wrong, so I'll just keep playing!
ReplyDeleteI follow your blog and it is so inspiring. So I have this award for you.
ReplyDeletethank you so much!
I love learning new techniques in Photoshop! Thanks so much for sharing!
ReplyDeleteCate, I posted on your blog in case you need help :)
ReplyDeletePam
Such a cool tutorial Pammy! I will definitely be using it again!
ReplyDelete